“Support & Resistance shows where price reacted. Supply & Demand shows where institutions entered. Learn how smart money actually moves the market.”
Introduction
Most retail traders rely only on indicators.
Professional traders focus on Supply & Demand zones — areas where banks and institutions place large orders.
These zones explain:
- Why price moves fast
- Where strong reversals happen
- Why some levels work perfectly
If you want to trade like smart money, this concept is essential.
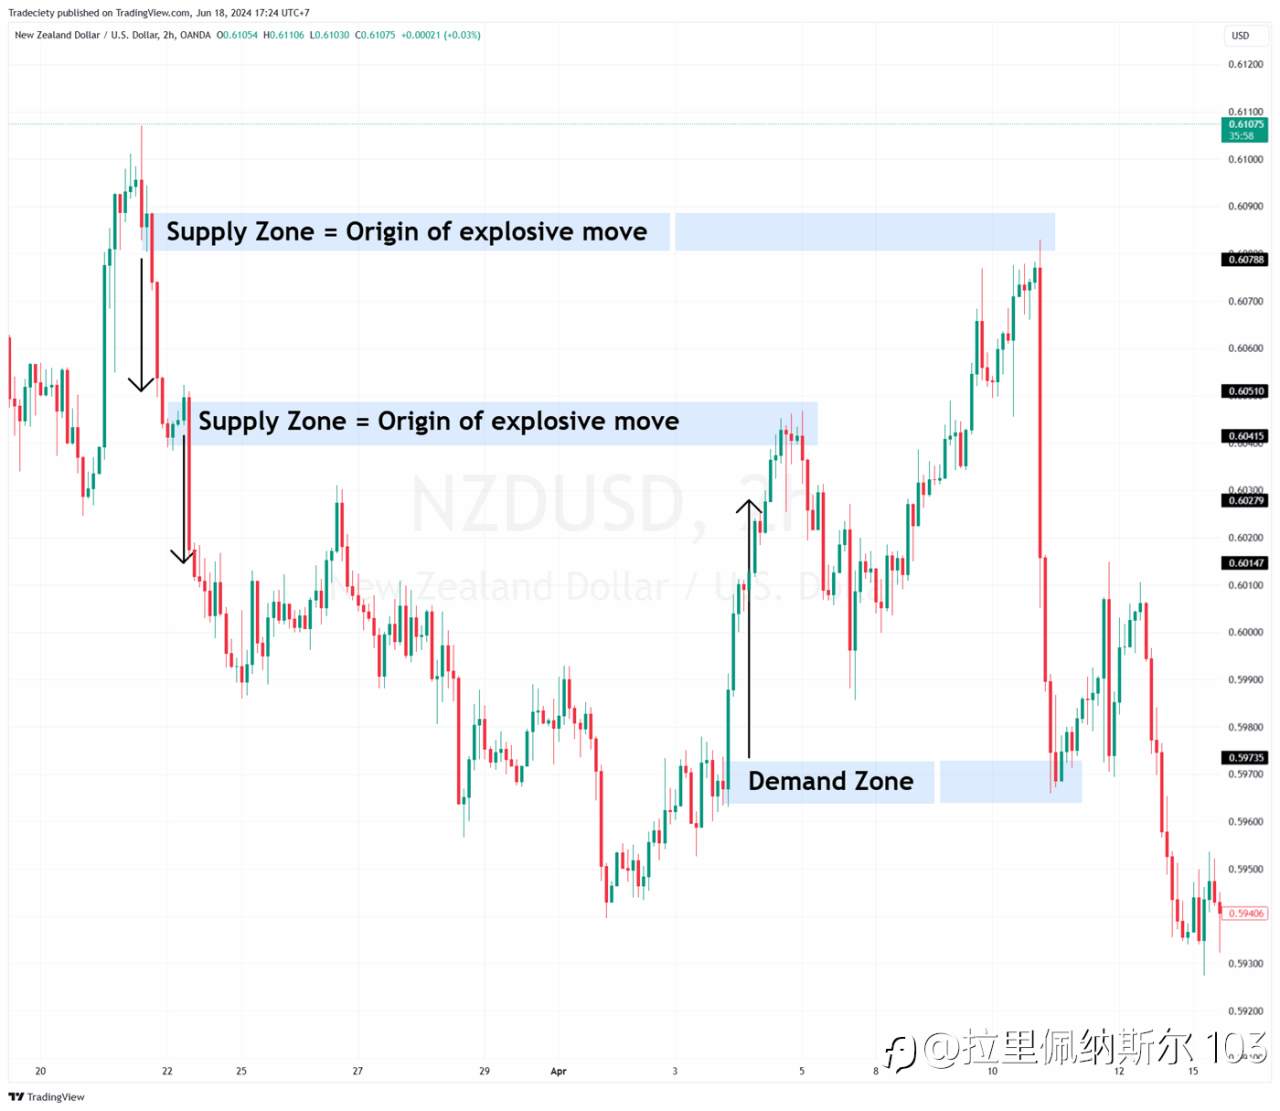
What Are Supply & Demand Zones?
🔵 Demand Zone (Buy Area)
A demand zone is an area where strong buying entered the market, pushing price up aggressively.
Characteristics:
- Sharp upward movement
- Large bullish candles
- Minimal pullback
➡ Price often reacts strongly when it returns.
🔴 Supply Zone (Sell Area)
A supply zone is an area where heavy selling entered, pushing price down.
Characteristics:
- Strong bearish candles
- Sudden price drops
- Institutions unloading positions
➡ Price often rejects from this area.
How to Identify Strong Supply & Demand Zones
A high-quality zone has:
✔ Strong impulsive move
✔ Big candles with little pullback
✔ Fresh zone (not tested many times)
✔ Clear imbalance in price
✔ Break of market structure
Avoid weak or over-tested zones.
How to Trade Demand Zones (BUY Strategy)
✅ Conditions:
- Market in uptrend
- Price returns to demand zone
- Bullish rejection candle forms
- RSI or structure confirmation
Entry: Inside demand zone
Stop Loss: Below the zone
Take Profit: Next supply zone
How to Trade Supply Zones (SELL Strategy)
✅ Conditions:
- Market in downtrend
- Price returns to supply zone
- Bearish rejection candle forms
- Structure or RSI confirmation
Entry: Inside supply zone
Stop Loss: Above the zone
Take Profit: Next demand zone
Best Timeframes for Supply & Demand
Most accurate on:
- H1
- H4
- Daily
Higher timeframes = stronger institutional zones.
Common Mistakes to Avoid
❌ Drawing zones everywhere
❌ Trading old zones
❌ Ignoring trend direction
❌ No confirmation
❌ Trading during high-impact news
Quality > Quantity.
Pro Tip (High Accuracy Method)
Combine Supply & Demand with:
- Market Structure
- Candlestick patterns
- RSI divergence
This creates high-probability institutional setups.
Conclusion
Supply & Demand zones reveal where the real money trades.
When you learn to spot these zones, you stop chasing price and start letting price come to you.
This concept alone can transform your trading if applied with patience and discipline.
면책 조항: 본 게시글에 표현된 견해는 전적으로 작성자의 견해이며 Followme의 공식 입장을 대변하지 않습니다. Followme는 제공된 정보의 정확성, 완전성 또는 신뢰성에 대해 책임을 지지 않으며, 서면으로 명시적으로 언급되지 않는 한 해당 내용을 기반으로 취해진 어떠한 조치에 대해서도 책임을 지지 않습니다.

더 오래된 의견은 없습니다. 소파를 가장 먼저 잡으십시오.